☰

How to Make a Worm Bin with your Class
Teaching your class about soil and decomposition gives them a life-long skill they can take into adulthood. Before introducing a worm bin to your class and having them work as a team, here are some soil facts to teach:
How Soil is Made/Decomposition
Soil is composed of water, air, decomposed organic matter (things that were once alive that have rotted - e.g. leaves, grass, roots, etc.) & inorganic (things that were never alive - e.g. rocks) material. Decomposition, or the breaking down, of materials that become soil happens through natural processes. The decomposition of rocks occurs through weathering and eroding of mountains over time. The decomposition of organic matter occurs through weathering, and the eating and processing of these organic materials by the FBI’s (fungi, bacteria and invertebrates) who live in the soil. Soil that is rich in decomposed organic matter, called compost, or fully decomposed organic matter, humus, is highly valuable in gardening. Vegetables and fruits we plant rely on these stores of nutrients in order to grow.About Wormeries
Wormeries can serve as convenient, manageable powerhouses for high-nutrient value compost production. Wormeries of the variety described in this lesson can process all of the food waste of 4-6 people in a residence, or the qualifying raw fruit/vegetable snack/lunch food waste from a school class. Wormeries are an ongoing science experience, as the evolution of food waste to vermicompost (compost produced by worm digestion) occurs before your eyes in a matter of a few weeks! Add the complete worm compost to school garden planter boxes or potted plant science experiments to assess its impact on plant growth.How to Make a Worm bin - Instructions
 Materials:
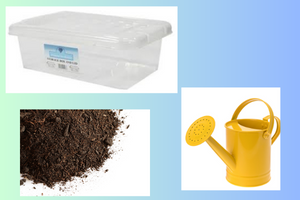
 * Opaque storage bin (30-40L)
* Drill/something to poke holes with
* Newspaper (50-100 sheets per bin)
* Organic matter/food scraps
* Some starter soil (2-4 cups)
* Water/ watering can or hose
* Worms! Red wiggler worms are preferred
* Approx. 250g per bin
Collect/prepare materials listed above
- Drill/poke holes in the storage bin - approximately 4 rows of 6 holes each. Holes should be approximately the size of the eraser of a pencil)
- Fill the bin with 4 cups of soil
- Shred the newspaper. Each student can shred one piece. Add the shredded newspaper to the bin - this acts like the worm’s “bedding”, but they also eat it!
- Put in the correct kind of food scraps - mostly raw fruit & vegetable scraps (favourites are banana peels and apple cores!) - Students can add in their food scraps at the end of snack or lunch time. Perhaps there could be 1 or 2 worm bin monitors who are in charge of this task
- Water the bin a bit each week - the moisture should be like wrung out sponge

- Bin placement - dark/cool place - Indoor or outdoor. If placing the bin outside, make sure there are no holes on the top because if so, the bin could get too filled with water.
- Maintenance - Continue to add food scraps. Add a layer of newspaper bedding each week and water as-needed.
- Harvesting the Vermicompost - Put in cooked pumpkin/squash or rotting banana- after 24 hours the worms will have gathered there and you can take out the finished compost to add it to the base of your plants in the garden (alternatively, you can empty out the top layer of worms/food scraps into a bucket and scoop out the finished worm compost below).